Unlocking Depth: A Practical Guide to the 3D Flower Field and 3D Butterfly SVG Bundle
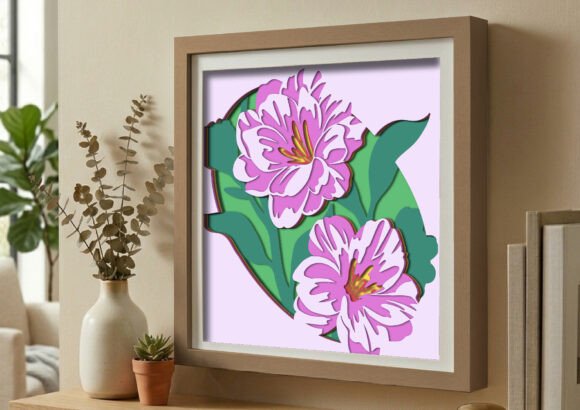
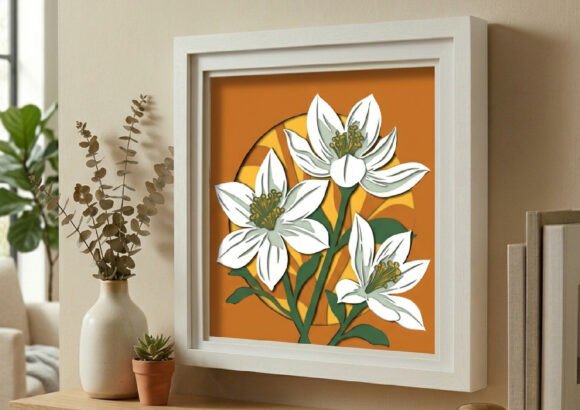
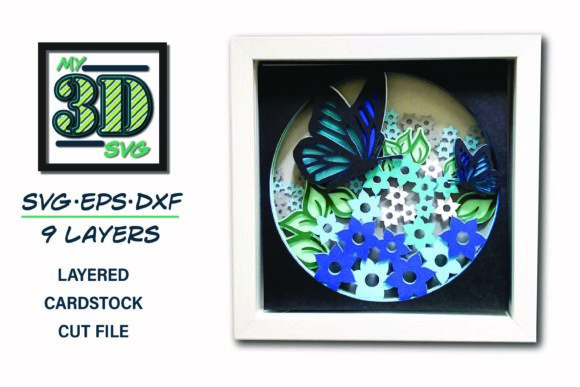
There is a distinct satisfaction in holding a paper craft project that leaps off the page. Unlike flat designs, layered creations offer texture, shadow, and a sense of life that static images simply cannot match. This is precisely why the 3D Flower Field - 3d Butterfly collection has become a favorite among crafters ranging from weekend hobbyists to small business owners. At its core, this design is an engineering feat for paper artists: a layered flower field SVG constructed with nine total layers. When assembled correctly with cardstock, it transforms a simple cut file into a vibrant, dimensional scene. However, diving into multi-layered projects without a clear strategy often leads to wasted materials and frustration. Understanding the nuances of these files before you cut is the difference between a professional-looking display and a crumpled mess.
The Complexity of Nine Layers
The most common misunderstanding beginners face when approaching the 3D Flower Field - 3d Butterfly design is underestimating the structural requirements of nine distinct layers. It is tempting to treat all layers equally, using the same weight of paper for the base as you do for the delicate top petals. This approach rarely yields good results. The bottom layers act as the foundation; if they are too flimsy, the entire structure will warp or collapse under the weight of the upper elements. Conversely, using heavy board for the topmost details can make the flowers look clunky and prevent the natural curling that gives them realism.
To avoid this, consider the physics of your build. The lower three to four layers should ideally be cut from sturdy cardstock, perhaps 80lb or higher, to provide rigidity. As you move up the stack, you can transition to slightly lighter weights if you desire more movement in the petals, though consistency is key for ease of assembly. A practical tip is to perform a test cut on a single layer set using scrap material. This allows you to gauge how well your machine handles the intricate details of the butterfly wings and flower centers without committing your premium colored paper immediately.
Color Theory and Visual Depth
One of the greatest strengths of this bundle is the instruction to "mix up the colors and see how the design changes." Yet, many crafters overlook the impact of color value on dimensionality. A frequent mistake is selecting nine shades that are too similar in tone. If every layer is a variation of pastel pink with little contrast, the shadows created by the layers will vanish, and the project will appear flat despite the physical depth.
For the best visual impact, apply a gradient strategy. Start with the darkest shade at the very bottom and progressively lighten the colors as you move toward the top layer. This mimics how light naturally hits a flower, enhancing the illusion of depth. Alternatively, for a more whimsical look involving the 3D butterfly, try complementary colors for the background field versus the foreground blooms. Remember, the SVG format allows you to manipulate these colors digitally before cutting. Take advantage of this in your software to preview the contrast. If the layers blend together on the screen, they will certainly blend together in paper form.
Navigating File Formats and Software Compatibility
When you purchase a high-quality bundle like this, you typically receive a variety of file formats: SVG for Cricut Design Space, DXF for Silhouette Studio, and EPS for Adobe Illustrator, Make the Cut, Corel Draw, and Inkscape. A significant error occurs when users select the wrong file type for their specific machine or software version. For instance, attempting to use an EPS file directly in a basic cutting machine interface without proper conversion can lead to scaling issues or lost vector data.
If you are a Silhouette user with the standard (non-Designer) edition, relying on the DXF file is crucial, as SVG support may be limited or require workarounds that complicate the layering process. On the other hand, Cricut users should stick to the SVG file to ensure that the cut lines, score lines (if applicable), and layer organization remain intact upon upload. For those using professional vector software like Illustrator or Inkscape, the EPS file offers the most editing flexibility, allowing you to ungroup elements and customize the flower shapes before sending them to the cutter. Always verify that your software preserves the layer order upon import; sometimes, files import in reverse z-order, requiring you to manually rearrange them to match the intended assembly sequence.
Assembly Pitfalls and Adhesive Choices
Even with perfect cuts and ideal colors, the assembly phase is where many projects falter. The temptation is to glue the layers down completely flat. While this secures the pieces, it eliminates the very 3D effect you paid for. The goal of a nine-layer design is to create pockets of shadow between the sheets. To achieve this, use foam adhesive squares or rolled paper tabs between specific layers rather than liquid glue across the entire surface. This technique lifts the upper layers, allowing light to pass underneath and cast soft shadows that define the petals and the butterfly's wings.
Furthermore, alignment is critical. With nine layers, a misalignment of even two millimeters on the bottom layer compounds as you move up, resulting in a lopsided flower field. Use a lightbox or a bright window to align the registration marks or the outer edges of each layer before adhering. Start by tacking the corners lightly, check the alignment from a distance, and then commit to the final bond. Rushing this step often means peeling apart glued cardstock, which damages the surface texture and ruins the finish.
Making the Right Choice for Your Project
Before downloading or purchasing the 3D Flower Field - 3d Butterfly package, evaluate your end goal. Are you creating a greeting card, a wall art piece, or a centerpiece? The scale of the final product dictates the size of your cardstock and the capacity of your cutting mat. A design intended for a 12x12 inch mat might need to be tiled if you are attempting a large-scale wall installation, which introduces seam lines that must be hidden. Planning the scale beforehand prevents the headache of trying to piece together a giant flower from mismatched sections.
Additionally, consider the environment where the art will live. Paper is susceptible to humidity and direct sunlight. If this piece is for a long-term display in a sunny room, consider sealing the finished product with a UV-protective spray or framing it behind glass. Neglecting environmental factors can lead to fading colors or warping paper over time, diminishing the quality of your hard work.
Ultimately, the versatility of this layered SVG set lies in your ability to control the variables. By respecting the structural needs of the nine layers, choosing colors with intention, selecting the correct file format for your workflow, and assembling with patience, you transform a digital file into a tangible work of art. Whether you are a freelancer delivering custom decor to a client or an educator teaching a class on paper engineering, these practices ensure that your final output is not just cut, but crafted with excellence.