Crafting Stunning 3D Layered Christmas Ornaments: A Guide to Perfect CNC and Laser Projects
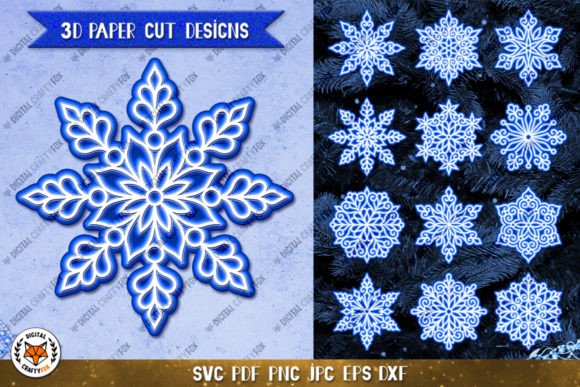
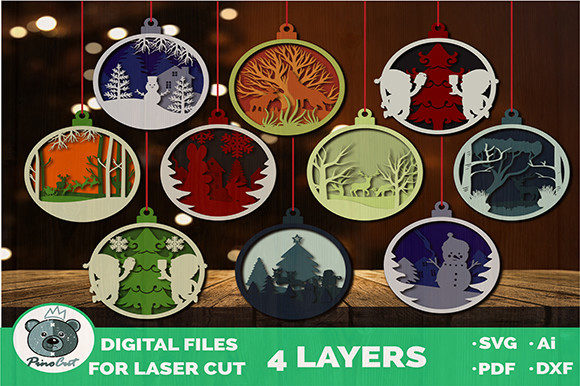
The holiday season brings a unique desire for handmade decor that feels personal and special. Among the most popular trends in DIY crafting are 10 3D Layered Christmas Ornaments. These intricate designs transform flat sheets of material into dimensional, eye-catching decorations perfect for any tree. Whether you are a hobbyist looking to create gifts for family or an entrepreneur aiming to launch a small batch production line, understanding the nuances of these projects is essential. The appeal lies in their versatility; they can be crafted from plywood, wood, or even acrylic, offering a rustic or modern aesthetic depending on your finish. However, diving into vector-based manufacturing requires more than just downloading a file and hitting "start." To ensure high-quality results and avoid wasted materials, creators must navigate several common pitfalls regarding material selection, machine settings, and assembly techniques.
Understanding the Project Potential and Common Material Mistakes
At their core, these ornaments rely on precise layering. The digital files provided are typically vector drawings designed for laser cutting or CNC routing. The concept is straightforward: multiple layers of material are cut and stacked to create depth. While the promise of an economical and easy-to-assemble project is true, many beginners stumble immediately by ignoring material specifications. The most frequent error involves deviating from the recommended material thickness without adjusting the design scale.
Most 10 3D Layered Christmas Ornaments kits are optimized for 3mm plywood. This thickness offers the ideal balance between structural integrity and delicate detail. If you attempt to use 4mm or 6mm wood without scaling the vector file, the slots intended for joining layers will be too tight, causing the wood to split during assembly. Conversely, using material that is too thin results in loose joints that require excessive glue, ruining the clean lines of the final product. Before you begin, always measure your stock with calipers. Plywood thickness can vary significantly between brands and batches. If your material is slightly off, you may need to scale the entire vector drawing in your software by a fraction of a percent to ensure a snug, friction-fit assembly.
Navigating File Formats and Machine Settings
Another area where creators often face frustration is the handling of the electronic files themselves. These projects usually come archived, containing vector cutting plans compatible with standard design software. A common misunderstanding is assuming that any vector file works identically across all machines. Laser cutters and CNC routers interpret paths differently. For instance, a line meant to be cut might be interpreted as an engrave path if the color coding in your software isn't set correctly.
Furthermore, when working with plywood, the quality of the cut edge matters immensely for layered projects. If your laser power is too high or your speed too low, you risk burning the edges. In a 3D layered ornament, these burn marks become visible between the layers, creating dark, unsightly gaps that detract from the professional look. On the other hand, insufficient power leaves uncut tabs that break unevenly. The best approach is to run a test cut on a scrap piece of the exact same plywood batch. Adjust your speed and power until you achieve a clean cut with minimal charring. Remember, these files are meant to be modified. If you find the default kerf (the width of material removed by the cut) doesn't match your machine's reality, take the time to offset your paths slightly before cutting the full set.
Assembly Techniques for Durability and Aesthetics
Once the pieces are cut, the assembly phase begins. This is where many projects fail to reach their potential. Rushing the gluing process is a significant mistake. Because these ornaments consist of multiple layers, applying too much glue can cause it to squeeze out into the visible crevices. Once dried, this excess glue resists paint and stain, leading to a blotchy finish. Instead, apply adhesive sparingly using a fine-tip applicator or a toothpick. Focus on the contact points rather than coating the entire surface.
Clamping is equally critical. Unlike simple flat cuts, 3D ornaments require pressure in multiple directions to ensure the layers sit flush. Using rubber bands or specialized small clamps can help maintain alignment while the glue sets. If you skip this step, the ornament may dry with a slight twist or warp, making it hang unevenly on the tree. For those planning mass production, consider creating a simple jig or fixture that holds the layers in perfect alignment, allowing you to assemble multiple units simultaneously with consistent quality.
Finishing Options and Commercial Considerations
The beauty of 10 3D Layered Christmas Ornaments lies in their customizability. After assembly, you have the freedom to paint them in any color or decorate them with glitter, ribbons, and beads. However, a common oversight is neglecting to sand the edges before painting. Laser-cut plywood often has soot or rough edges. Lightly sanding the faces and edges ensures that paint adheres smoothly and evenly. For a natural wood look, a clear sealant or wax can enhance the grain while protecting the wood from moisture.
For entrepreneurs and small business owners, these projects offer a fantastic opportunity. The licensing terms typically allow you to print and sell as many physical products as you like, making it a viable option for holiday markets and online shops. However, it is crucial to adhere to the restriction: you may not sell or distribute the digital files. Your value proposition is the finished, handcrafted item, not the blueprint. When pricing your products, factor in not just the cost of the 3mm plywood, but also the time spent on machine setup, assembly, finishing, and packaging. High-quality finishing can justify a higher price point, distinguishing your work from cheaper, mass-produced imports.
- Check Material Consistency: Always verify the actual thickness of your plywood before cutting to ensure proper fit.
- Test Cut First: Run samples to dial in laser power and speed, preventing burn marks that ruin the layered effect.
- Mind the Glue: Use minimal adhesive and clamp layers securely to avoid visible residue and warping.
- Prep Before Painting: Sand edges lightly to remove soot and ensure a smooth, professional paint finish.
- Respect Licensing: Sell the physical ornaments freely, but never share or sell the digital vector files.
By paying attention to these details, you transform a simple download into a high-quality product. Whether you are making one ornament for your own home or hundreds for customers, the difference between a good result and a great one often lies in the preparation and the care taken during assembly. Embrace the flexibility of these designs, experiment with different finishes, and enjoy the process of bringing these festive 3D creations to life.